by Doug Haluza. FINAL DRAFT 2017-05-25
I definitely learned a few things as a back of the pack pseudo-racer on the 2016 Trans Am Bike Race. Doing TABR that year was not pre-planned—I only got the opportunity to do it last minute. I had not been doing enough training to do it quickly, but I did get it done slowly, finishing 50 out of 51 (but ahead of the 15 riders who scratched).
Here are some notes that may help you do TABR (or another bike-packing adventure). It’s mostly qualitative data based on my research and experience, with some quantitative data in solved math problems. I’ve included things which may seem obvious to experienced riders, just in case they’re not obvious to others. This isn’t intended to be a comprehensive guide, so research other sources as well. These are just my notes to self, shared for reference only: you are still completely responsible for your own health and safety, of course!
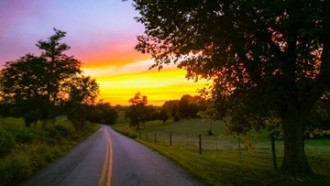
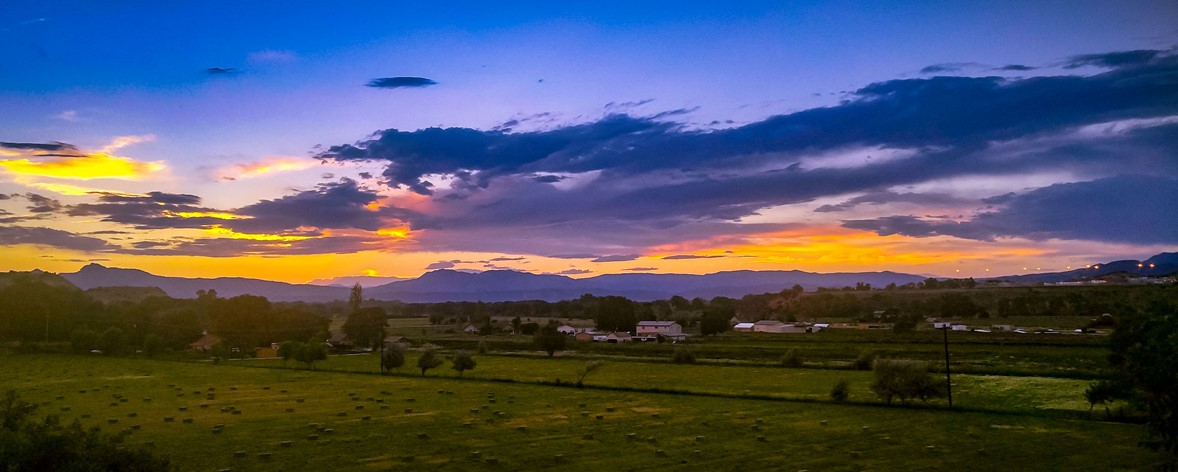
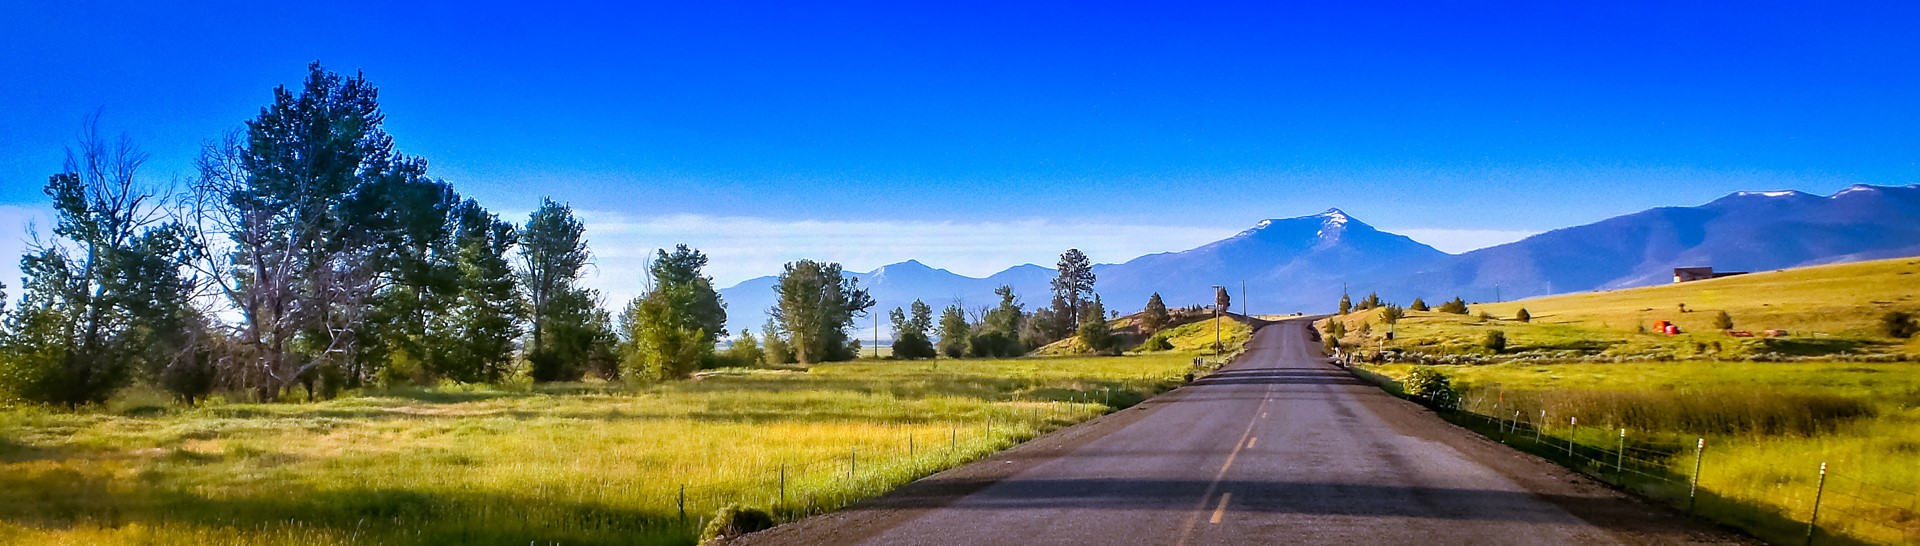
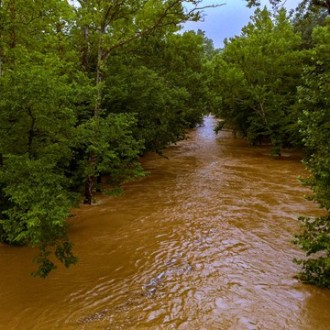
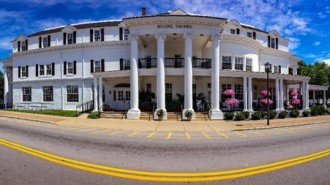
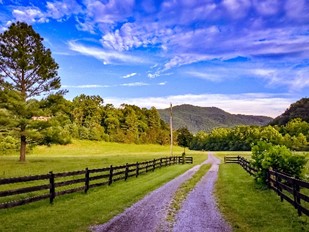
These notes are listed roughly in chronological order, from pre-race planning, through the race from West to East, broken into four quarters. Mile markers are from the RideWithGPS posted route, and may not agree with TrackLeaders or other apps. Some pictures are related to the text, others are just eye candy. All photos are my own, taken with a mobile device contemporaneously with the ride activities.
For best results, put your display in landscape mode, and adjust your browser’s zoom level so the full with pictures and text fill the browser window.

PRE-PLANNING
First, figure out what you want to accomplish, and don’t forget it (and you will learn that you can forget a lot out on the road). If you think you have a shot at winning, then take your best shot. But if you’re just racing yourself, then don’t defeat yourself!

TABR = RAAM + 1000 mi – crew. That last factor is the key—you must be completely self-supported, with no dedicated crew attending to your needs. I was a fairly active RUSA randonneur and UMCA 12/24 hour racer riding without crew, so I had experience with long and self-sufficient rides in all kinds of weather, including rides that started and/or finished in the dark. I ended up riding TABR more like a brevet than a race; but I was still racing in the sense that I rode as far as I could between stops only as needed, rather than riding between pre-planned daily stops like a touring cyclist. After waking, I got back on the bike morning, noon, or night, not knowing when or where I would sleep next. It’s a puzzle that you just need to figure out in real time.
Read the rules, and make sure you understand them. If you haven’t done a bike-packing race before, this will probably be unlike any riding you have done, so ask for clarification if needed. For this type of race, self-sufficiency is key. If another solo rider has a flat, you are not supposed to help them, nor should you expect help from other racers. You can accept neutral assistance from “trail angels,” but you cannot conjurer “trail magic.” Your family can only provide emotional, not logistical support. If you are going to do this thing, then you may as well do it properly.

Don’t ask me how to train for this, because I didn’t really train for this. There are many different strategies, so find one that works for you. Obviously you will be riding your bike a lot more than anyone else you know who isn’t a transcontinental racer. The craziest thing I had ever done in prior years was riding 200 mi to the start of a double-double century, which became a week-long credit card tour, so this wasn’t my first time being “in the wind” on my bike. I also trained for and rode a 24h TT four months before. But I was mostly a weekend warrior, and wasn’t able to train much during the week due to a long commute to work, so that was sub-optimal at best. One thing to keep in mind is that both mental and physical preparation are needed.
You may need to gain weight. Riding 4000 mi will burn the equivalent of about 40 pounds of body fat (7000km and 20kg in metric units). You won’t have time to eat and digest enough calories to cover that, especially if you are riding fast. So cutting body fat prior to the race in order to climb faster may be counterproductive. This wasn’t a problem for me, but I heard one really skinny rider ahead of me fainted a couple of hundred miles into the race. I was shocked to see I had developed a thigh-gap fairly early on, and I had lost 20 lbs by the time I finished. I had to replace my bib shorts with ones two sizes smaller before halfway, so bring clothes that fit tight.
You need a nutrition strategy. Since I’m more of a randonneur than a racer, my strategy was simple: eat real food (or as close to real as you can get on the road). You can try to carry sports nutrition products, but resupply can be difficult, whether you are buying or shipping it. I do recommend planning on one sit-down meal a day. Trail mix is available in many places, and it’s a good nutrient dense food to carry for when you’re sleeping out. Peanut M&M’s are also an easy to find and carry snack that has all four macro-nutrients: protein, carbs, fat, and chocolate!
You also need a riding and resting strategy. The front of the pack riders stay out longer, but actually have a slightly lower moving average speed than the middle of the pack riders—that means more hours in the saddle and less hours sleeping. Decide whether to stay out longer and go slower, or ride faster with more rest. Your moving average speed will slowly drop off on each ride segment the longer you stay out after sleeping, but your overall average speed will decrease even more as you take longer and more frequent breaks. At some point it will be more productive to just sleep through a longer break.

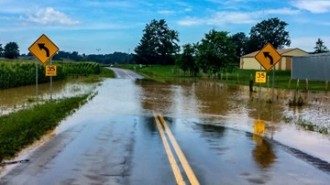
Consider your contingency strategy. You will be in the wind for weeks. Hopefully you will make steady progress with only manageable issues when you are out in the boondocks. There are only one or two major population centers per state on route (and some more just off route). If you are heading towards one while you or your bike are in doubt, you may chose to proceed. But once you reach one, carefully assess whether to continue or stop. Availability of medical services in particular can be hit or miss in rural areas. If you get a ride back to a town you left behind to deal with a problem later on, you must re-ride all those miles to continue racing after the problem is resolved. So it may be better to deal with it sooner, rather than later.

Bring a reliable, practical bike. Avoid unnecessarily lightweight, exotic, or proprietary parts that are not backward compatible with more standard stuff, or that a bike mechanic in a rural bike shop won’t be familiar with. This way if something needs to be replaced en route, you can use inexpensive, readily available parts. Better still is to have reliable parts that won’t need replacement. Leave any stupid-light stuff at home, and go with more durable components. An overly expensive looking bike may just be too tempting to would-be thieves as well.

Carry spare parts, and the tools to install them. A SaG crew won’t be handing you a spare bike if something fails. You’ll be doing a year’s worth of riding in a month, so expect a whole year’s worth of failures. Don’t carry anything you don’t really need, but do carry things you might need in a pinch. Excess weight will not slow you down that much. Adding 1% to your all-up riding weight will only increase your riding time by about 0.2% on a moderately hilly course like this (<40 mi climbing in >4000 mi is an average grade of <2%). You will be moving about 300 hours at around 14 mph, so an extra 0.2% is less than one hour. Not having the part you need could cost you a day or more.
Start setting up your bike well in advance. I had done credit card touring before, so I had some of the gear I needed, but not all. The devil is always in the details. It will take more time than you think to figure out what you really need, and to try different things to see what works. But try everything out first, and get any issues worked out ahead of time, so you are not dealing with new problems during the race.

BIKE SET-UP
Naturally you need a bike that fits. But forget about arbitrary “rules” of bike fit like knee over pedal spindle, eyes over front axle, and especially the level saddle. If your bike fitter religiously clings to these, find another. Get someone who is going to work with you to determine what you need. What works for riders who think a century is a long ride, or that a race is over in an hour, may not be optimal for this. Also don’t get fit on a rest day; get fit at the end of your last training day before a rest. When you’re tired is when your bike really needs to fit.
The level saddle myth probably comes from a UCI rule, which has since been relaxed due to rider complaints. If the nose of your saddle is too high, it can eventually lead to chafing in the thigh-gap area of your groin on rides much longer than a “normal” race. If your saddle nose is too low, it increases hand pressure, so it’s a delicate balance. I recommend a textured seat covering to reduce the tendency to slide forward. I used a neoprene seat cover which provides a few mm of extra padding with a fabric finish.
A comfortable seat is a big plus. I used an old, discontinued Fizik Rondine Wing Flex saddle which had served me well. But after the race, I found it had cracked across the wings at some point. I’m still looking for a suitable replacement, so I have no specific recommendations (other than to go with the devil you know, rather than take a chance with a devil you don’t). Avoid weight-weenie stuff like hollow seat rails, though. If one cracks, you’ll be riding standing to the next town. If that’s not Breckinridge, CO, where you’ll find the only bike shop at the top of a climb, then it will cost you time.

Paniers are for tourists. You won’t be setting up camp—you’ll be stealth-camping. Adventure cyclists have settled on centerline mounted bags, and that’s what most riders have used on TABR. Most of your gear should be drafting your behind. The rest goes in and on your frame triangle, arranged for minimum drag. Many riders also had some sort of handlebar bag, but I used handlebar mounted headlights, so this was not an option for me. You can also put a bag (or just your ground pad in its bag) under your aerobars. Best bet is to look at photos from years past for ideas. Make sure the area between your legs is clear of interference, or else that will drive you nuts well before mile 4000.

Aerodynamics do matter. There’s a popular mis-conception that aerodynamics only really help racers going over 20 mph. While faster riders see a greater speed improvement from reduced drag, slower riders will save more time. Many people also think that aero wheels “cut through the wind,” but that’s not true either. Profile drag at zero yaw angle (wind on the nose) can actually be higher for deep aero wheels, but once the yaw angle goes above zero, the aero wheel has an advantage. It’s actually using the crosswind component to generate sideward lift, with a negative drag component. So I do recommend aero wheels, as long as they don’t cause handling issues in gusty winds, or in the turbulent wake of large trucks. The modern aero wheels that are fatter in the middle and rounded in the back handle much better than the older ones that are pointy in the back. Be conservative with front wheel depth, because that’s the one that really affects handling.
Consider disc brakes. After this I bought a disc brake bike. One of my riding buddies asked what made me decide to go with disc brakes, and I told him: “descending in the Rockies…in the rain.” When carrying extra weight on long winding descents, you don’t want to be wondering if overheated rims will cause a blowout, especially if you have carbon rims, and descending with a wet carbon rim braking surface is a problem too. I went with mechanical disc brakes on my new bike because I can carry a spare cable, and dual action calipers are simpler with cable actuation (as opposed to dual piston hydraulic). With mechanical brakes, especially discs, make sure you are pro-active about tightening the cable as the braking surface wears; otherwise, when the brake levers hit the handlebars, you’re done! I did complete the ride on my rim brake equipped bike, but I had to take it easy on some descents.

Two water bottles won’t cut it. Nobody’s going to be handing you bottles on this race! Carry at least three where services are scarce in the high desert, and to avoid having to stop more often to reload when services are available. I recommend fitting a third cage under your down-tube. Your racing bike won’t have mounts there like a touring bike, but you can get strap-on cage mounts (put some tape under the straps to protect the finish). You can also mount a bottle between your aerobars. Otherwise carry another bottle in your pack or in your pocket. You could wear a hydration pack, but I didn’t want one on my back all the time. A hydration pack could also be integrated into your frame triangle bag. If you carry just plain water in one bottle, you can always use it to clean up road rash or whatever.

Get roadie aerobars. The main purpose of aerobars on a long haul bike is physiological, not aerodynamical. They give you another riding position to stretch out your back and take a load off your hands. But use a much more relaxed position than on a 40k TT or even an IM Tri bike. Set the arm rests high enough to look all the way down the road, all of the time, without straining (and possibly developing Shermer’s Neck). Angle them up slightly above level for comfort as well. Start practicing with aerobars sooner rather than later to get adapted and well-adjusted beforehand.
Carbon handlebars are contra-indicated. Clamp-on aerobars usually don’t play nice with carbon handlebars. If your carbon handlebars get damaged, and/or start coming apart, your bike will be un-ridable. If your aluminum handlebars get bent, you can still keep going.
Wrap your handlebars with comfortable tape. Some riders double-wrap their bars. I prefer a double-overlap single-wrap (one roll of tape on each side of the shifters on each side). If you stick with a standard single-wrap, use a thick, cushy tape. Gel pads and/or old rubber inner-tubes under the tape are also a good idea.

Consider a suspension stem. One universal complaint of long distance riders is hand numbness. I put on an air shock suspension stem from StaFast around mile 3000, and I think it helped with the hand numbness, so I still have it on that bike. And because of this, my new bike is the 2017 Specialized Roubaix with a spring suspension steerer tube. Now when I ride a non-suspension bike, I really notice the difference.

You will need easier gears! Most of your nine continental divide crossings will be above 8000′ where the available oxygen (partial pressure) is only 3/4 of that at sea level; and the highest crossing at Hoosier Pass, CO is over 11,500′, where it’s only 2/3. This makes your gears feel harder. So although the grades in the Rockies aren’t that steep, they feel steeper. Many of the lower altitude climbs in Missouri, Kentucky, and Virginia are steep, so higher gear ratios will help there too. Don’t think that you can do TABR with TdF gears; they ride a 15 lb bike only half as far, drafting in a peloton, with all their gear in a SaG, while eating and sleeping a lot more too (wussies)!
How much easier? You will be carrying around 20 lbs of extra gear, which will probably increase your all-up riding weight by 10% or more. If you normally ride an 11-23 cassette in hilly terrain, you will need at least an 11-25 just to cover the extra weight. Add an additional 10-30% to compensate for altitude and fatigue, which brings you to an 11-30 or so. I used a 50/34 compact crank and an 11-32 cassette, which requires a mid-cage derailleur. I wish I could have gone bigger, but that’s as big as you can practically go with double front chain rings, and I didn’t want a triple. You might also consider a 1x road setup now.

What about descents? I wouldn’t worry about spinning out on the descents—if you can go fast without pedaling, it’s probably better to take a break and save it for later (resting while moving is much better than resting while stopped). So you can also go with a 12-32 cassette if you’re worried about the bigger jumps between non-climbing gears. Having a lower ratio bail-out gear will keep you moving when you’re trashed so you don’t have to stop climbing in the middle of nowhere.
Go with longer cranks too. Road race bikes have shorter cranks so racers can pedal at high cadence, through turns, and while low in the drops. You will be riding a more relaxed pace and position, so longer cranks can be a good option. The idea is to reduce pedal forces to conserve glycogen, not to mention strain on your knees. I used 180mm cranks, which were only available in aluminum. That’s just as well because every carbon crankset I’ve used in the past eventually came apart.

Use single-sided road pedals with SPD clips. These provide almost as much lateral support as road cleat pedals, without requiring coffee shop cleat covers. Either way, put new cleats on your shoes before the start so they are not releasing after they wear out, requiring replacement en route.
Overhaul your drivetrain before the start. Plan to replace your chain before the start, and again midway—you can do that at the Newton Bike Shop in KS, or mail yourself one at the half-way point in Pueblo, CO (there are bike shops there too). Plan on replacing your cassette before the start (see above). Check your chain-rings to make sure they have at least 4300 mi left on them too.
Other things to have the mechanic check before you shove off: Bearings may not be easy to replace en route, so any play doesn’t play. Have your wheels trued, and the spoke tensions checked to make sure they are tight and even—the wheel can be true with uneven tension, but this will lead to fatigue failure of the spokes, so make sure your mechanic uses a spoke tension gauge. And don’t forget to get new brake shoes and tires. Your tires will also need replacement en route at the usual intervals, so plan accordingly.

Go with bigger tires as well. I went with 700x25c tires because that’s all that could fit inside my road brake calipers, but some racers went even bigger. You also want a tire that gives a good balance between rolling resistance, puncture protection, and tread life. There will be lots of chip seal pavement, which can be especially harsh riding on skinny, high-pressure tires, especially when it’s brand new. Finishing fast (or at all) requires the ability to stay on the bike.
Carry a spare tire (or two). I hit a broken section of concrete pulling into a convenience store and completely blew a tire. Without a spare, I would have had to wait for FedEx to bring me a new one. If this happened on Friday evening, and that town only had 2nd day shipping service, I could have been stuck until Wednesday. Your spare(s) can be a smaller, folding lightweight racing tire. It just needs to get you a few hundred miles (!) down the road to the next bike shop.
Carry more than one spare tube. I would recommend a minimum of three, so if you double flat, you still have a spare. Carry a patch kit (with fresh cement) so you can recycle the tubes if necessary, and spare rim strip(s) too. I only flatted four times in over 4000 mi, so it wasn’t a problem for me. But one racer scratched after persistent flats ended with him riding 100 mi on a flat tire. Not sure what the problem was, but I suspect a bad rim strip allowing the tube to squeeze into the spoke nipple holes.

I recommend sticking with standard clincher tires. Tubular tires are for supported rides. Tubeless tires may be attractive because you should flat less often, and you could plug a leak that won’t seal without dismounting the tire. Carry spare tubes anyway, and be prepared repair a flat with a tube, twice. Try this at home first: put a tube in a tubeless wheel and tire coated with tubeless sealant, re-inflate it, and then try changing the sticky tube, outdoors, on the side of the road, in the dark. If you go tubeless after this, you will probably carry gloves, and stop to start over with a new tire and spare tube at the next bike shop after flatting. Whatever system you use, make sure you have plenty of experience fixing all kinds of flats by yourself.

Mount a small (not mini) tire pump with a gauge. Your tires will need air every few days, even if you don’t get a flat. Don’t count on finding a bike shop with a pump to borrow. There are only about one or two per state on course, and they are only open during normal business hours, while you will be riding ungodly hours.
Carry a spare shifter and brake cable. I didn’t need them, but they are easy to pack and hard to find en route. You wouldn’t want to be descending a mountain with only one working brake, or climbing with only one gear. Naturally check your cables before the start and replace them if there is any question. Make sure they are not binding, and that they are well lubricated in the sleeves. Don’t use Teflon coated cables—the Teflon will peel off and bind the cables over time.

Finding a replacement derailleur hangar is hard. Order one to carry in case your bike falls over on the derailleur. And your bike will try to fall over a lot when you are off of it, because it’s going to be top-heavy with all that extra stuff. You will be surprised to see how deftly it can pirouette away from you despite your best efforts to keep it upright.

I carried spare spokes, and had to use them twice. You will also need a cassette tool to change rear spokes (you can use a gloved hand, or the chain on the bike, in place of a chain whip). Lightweight riders may not need them, but being a Clydesdale, I’m surprised I only broke two spokes (and a rim) with all that climbing. Tourists riding Surly Long Haul Truckers have spares frame mounted from the factory, but you must keep spare spokes and nipples in your pack. With disc brakes on a wide tire clearance frame you may be able to press on to the next bike shop, which could be in the next state, but with rim brakes and a narrow frame, not so much. Even so, if that bike shop in the boonies doesn’t have your spoke in stock….
Use well-built wheels. Lightweight racing wheels are fine for a local race with SaG support, but you want more spokes for this. The circumference of a 700c wheel is about 2 meters, so in 7000 km you will put the spokes through 3,500,000 load cycles, which is a lot. Spokes don’t fail from high tension overstress—they tend to fail from work-hardening metal fatigue due to becoming slack as they pass bottom dead center repeatedly. So under-tension is the big problem, not over-tension. More spokes distribute the load better, so each individual spoke has less stress each cycle. Butted spokes are also better for fatigue life because they stretch more, so the tension changes are less for a given deflection.
Get your wheels re-built if they have a lot of miles on them, especially if you have already broken and replaced a spoke. I would assume that if a spoke has failed from fatigue, there’s another one ready to go right behind it, and another right behind that one. Also check to make sure your spokes are not nicked from the chain going over the big cog, or any other type of damage. Even a shallow scratch will form a stress riser which will eventually develop into a crack that will only grow. But do this in time to break-in your rebuilt wheels for a few hundred miles first, so you can get them re-tensioned and trued.

You can offset the higher spoke count drag with Sapim CX Ray aero spokes, which actually have better fatigue life, and give a softer ride. You also want the 2x or 3x lacing pattern from a higher spoke count for a soft ride. Forget about a radial laced front wheel–that will just transmit more road vibration to your hands. Wheels with 2:1 spoke ratio are another way to get an effective higher spoke count with less drag and better balanced spoke tensions.
A dynamo front hub is the way to go, especially to be competitive. I used rechargeable lights. It was a pain, and a waste of time, having to find places to recharge them and my phones, especially when sleeping out. Either way, carry a backup headlight and tail light so you don’t need to stop in some random place at night if one fails. LED’s are way more reliable than old fashioned bulbs, but there are a lot of other things that can fail and leave you with no light. You will also need a battery powered light to make repairs at night, and to select and prepare your stealth campground. This could be a helmet mounted headlamp if you prefer. I would also recommend keeping at least one battery powered light on when riding after sunset, so if you crash, that light will stay illuminated to alert passersby.

OTHER GEAR TO BRING:
Bring a Sharpie pen to sign autographs! Just kidding, but here’s some things you may really need:

Carry a mini tool, and know how to use it. In addition to having the right size tool heads to fit all the fasteners on your bike (including accessories), you also need a spoke wrench and chain breaker. You should know how to re-true your wheels because spokes may come loose and require re-tightening. Carry a quick link to fix a broken chain. If you don’t know how to do these things, find out and practice at home first. I lost my mini-tool and had to replace it twice en route, so carry a smaller spare too, just in case.
The single-speed conversion could be a useful trick too, but only if you have a chain tool and an extra quick link. You can shorten your chain to give you one gear so you can keep riding if your rear derailleur jams and breaks, and/or your chain gets twisted. But you must find a chain length that matches a useful chain ring and cog combo with minimal slack. Again, try this at home first with your old chain so you can pull this out of your bag of tricks if needed.

Bring a small 3-way outlet splitter. This allows you to recharge all your various devices when you only have one free outlet available. BTW, Motel 6 is a cheap place to crash, and they tend to have lots of outlets available in their rooms which is convenient. Many of the older motels (and campgrounds) have few outlets available.
Bring some tape, it can be handy. Just wrap some vinyl electrical tape around your seat tube, pump, or some other convenient place, so it’s there to secure something loose. Better still is Gorilla Tape, which can also be used to boot a cut tire.
Get a USB battery pack with a recharging AC plug built in. Even if you have a dynamo hub with a USB converter, it may only provide one charging port, it won’t work when you’re not moving, and you can’t use it while it’s raining. Having the AC charger built in means one less thing to lose.

Carry two phones on different carriers, or a cell enabled tablet if you prefer. Cell coverage can be spotty. I had AT&T and Verizon, and there were lots of times when one carrier worked and the other didn’t, but I didn’t notice any general advantage to one or the other. You can’t find, much less comparison shop, motels online without mobile data. I also used cellular data for weather radar to try to dodge the rain, so I only really got wet twice, and only because I decided to proceed. Riders just ahead of me had to ride out hailstorms in their bivvy, but I avoided that nightmare. BTW, don’t forget to cache maps for the route in Google Maps (or whatever app you use) ahead of time, so you can see how far it is to the nearest town without data coverage.
One of your phones needs to be water and dust resistant. You can use a case, or get an IPX67 rated phone like the iPhone7. Keep the other one in a plastic bag in your water resistant pack. Mount your primary phone on your handlebars so you don’t have to fumble with it, or worse yet, drop it. But be careful not to get distracted by it and crash.

Carry a backup navigation device. You will be following a GPX track. Some riders carried the paper ACA Trans Am Trail maps, which also have a lot of supplemental info, but they are bulky (you could break them up into your general delivery mail drops). I used Delorme Earthmate software on my iPhone for primary navigation, and also loaded the route into my InReach Explorer GPS tracker as a backup, which I had to use a few times when my phone was dead. I gave up on Garmin because the charging connectors always break from keeping a battery plugged in while riding.
If you are competitive, carry a backup GPS tracker. My InReach just up and died in KY, but nobody cared because I was in the back of the pack, and most of the way to the finish, so I didn’t stop to get a replacement overnighted to me. But if you can’t afford to lose a day (or more), be prepared. You can get an older version Spot pretty cheap on closeout or eBay, so that’s a good backup option. Spot trackers need Li batteries which are not readily available, but are very lightweight, so carrying spares is easy. Remember that your GPS tracker is also your 911 emergency backup when you are outside cell coverage, so you want it to work.
Carry a small bottle of chain oil. You must lubricate your chain periodically during its accelerated life cycle, and especially before and after riding in the rain. And you can put it on the cables too if they start to bind.

PERSONAL GEAR
Bring lots of butt cream. You also need to lubricate your posterior with plenty of lanolin, and stop to reapply often. I used Lantiseptic which is beeswax based, and preferred by many of my randonneur buddies. But when I ran out of that, I found some inexpensive lanolin cream in a pharmacy in Ennis, MT. You can get pure lanolin oil intended for breast feeding mothers, but it won’t flow at cold temperatures. You can also use the typical bike store stuff, but it’s all water based, so that’s somewhat less desirable. Petrolatum based creams are fine for after shower use, but they tend to make a real mess if used on the bike.
Wear walkable shoes with recessed cleats. Road cleats are ridiculously impractical when riding self-supported. On the steeper climbs, where you can walk almost as fast as you can ride, you can hop off to give your hands, butt, and feet a break, and to stretch out. You will be walking into stores and motels, as well as laundromats and restaurants after checking in. If you wear road cleats, you must carry and change into walking shoes from time to time. I just wore my one pair of mountain cleat shoes all the time. But I probably should have carried some lightweight flats to get out of my bike shoes at stops to combat hot foot. Some of my randonneur friends just love to wear their cycling sandals year-round, so consider that too.

Bring a pair of shorts and a T-shirt to change into, so you can wash your kit in the bathroom sink (or even better, the guest laundry) when you stop in a motel, or when you stop at a laundromat. I tried to do a load of laundry every third day or so. Changing into clean clothes can really improve morale. Just rinsing out your jersey when you find an open hose bib can also help, especially when it’s hot.
Pack winter gear. The McKenzie Pass will (hopefully) have just melted a few days before the start, and temperatures can still drop to freezing in the Rockies in early June. So you may need to wear all your warm clothes at night, whether you are riding or just sleeping out. I ended up having to hop back on the bike to warm up after waking up cold and moist from condensation inside my bivvy many times in the Rockies. You can mail the heavier stuff home when you get to eastern CO (or just mail it there if you are westbound).
Pack rain gear. My strategy was to avoid riding in the rain and make up for it by riding more at night. But to finish fast, just go ahead and get wet. Bring a serious, ventilated cycling rain jacket, such as those made by Shower Pass. I also carried a lighter, breathable rain jacket. You may also want rain pants and shoe covers, as well as a helmet cover. The key thing to remember is to put the rain gear on before you get wet; if you get wet first, it doesn’t help so much.
Pack sun gear. Not just sunscreen and sunglasses, but protective clothing as well, because you will be in the sun all day, and you get extra UV exposure at high altitude. Your head-dress should cover the back of your neck too. Bring arm coolers, or better yet a sun shirt with thumb loops so you can pull the sleeves down over your gloves to avoid leaving your wrists uncovered. Bring a light pair of full fingered bicycle gloves to cover your fingers (and for cooler weather, or as glove liners in your warmer gloves). A pair of knickers can help cover your knees when it’s not too hot, or you can wear your tights in the morning.

Crash in your bivvy before you crash on your bike. Yes, you must carry a bivvy sack, even if you are not planning to sleep out. You never know when you must stop and shelter in place due to weather, fatigue, a mechanical, an injury, or whatever. Sleep deprivation can catch up to you suddenly. So don’t be bashful about taking a ditch nap.
Get a more expensive breathable fabric bivvy, to help with moisture buildup inside. You also want a screen fly to protect you from bugs. An emergency type bivvy won’t have these essential features. Don’t forget to dry it out whenever you check into a motel so it won’t be wet and moldy when you need it.

Carry a ground pad, even if you don’t plan to sleep out. Crashing in some of the free accommodations available to bicycle tourists may mean sleeping on the floor, so a ground pad really helps there too. I got a very compact folding, inflatable type for about $100.
You need something to prop up your neck while sleeping. You could use spare cloths, or an inflatable pillow. But I just wore my helmet inside my bivvy—this also kept the bug screen off my face so the mosquitos couldn’t bite me through it.

Naturally you will wear a helmet. I’d recommend one with a removable or adjustable visor. At night you can use the visor to block oncoming headlights so you can still see the road and preserve your night vision. It can also be useful in the rain (especially if it turns to hail!). And it can help keep the sun off your face. But you must move it out of the way, or remove it, when you are in the aerobars. A helmet with a built-in bug screen is also a plus.
Bring whatever medication you may need. I won’t give specific medical advice because I’m not a doctor, but definitely consult with your physician to make sure you are good to go (ask about a rescue inhaler too—I used one a few times in the Rockies). If your annual physical is due before your expected finish date, it’s time to get that done (and your dental check-up too). Make sure your vaccinations, especially tetanus, are up to date. Also, be sure to actually read the directions for any OTC meds you may be self-prescribing to make sure you know exactly what you’re doing.

Bring first aid. It’s up to you how much to carry, but get a ready-made kit in the appropriate size. Definitely carry some alcohol wipes to clean small wounds or whatever. One other thing you may need is an antihistamine in case you get an allergic reaction to something out in the middle of nowhere.
Bring night gear. You should wear a retro-reflective vest and ankle bands at night. The vest really increases your apparent size to approaching drivers. A fabric retroreflective triangle on the back of your seat tube pack is also a good idea day and night to alert oncoming drivers sooner. Put retroreflective tape on your bike frame and wheels to alert traffic from all angles at night. And make sure your brightest tail light is set to steady illumination after dark—a blinking light only makes you visible half the time, making it very hard for drivers to judge their distance.
RIDE PLANNING
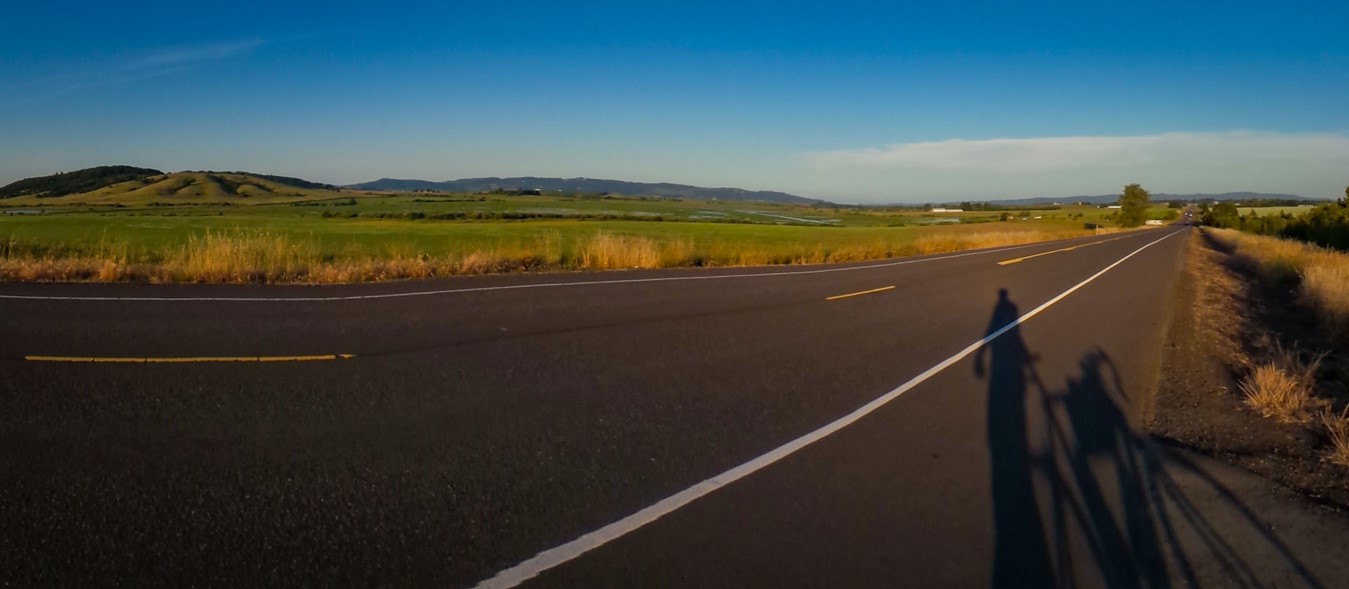
Plan to ride at night. If you are in the front of the pack, you will ride in the dark part of the time just to keep up. But even in the back, riding at night can be an advantage. First of all, you will get to enjoy watching sunset and sunrise! Winds will usually be lighter (I had 600 miles of headwinds in the plains of CO and KS, so I went on the night shift there). Drivers can’t sneak up behind you at night, and they can definitely see you well in advance too. Also since you are on back roads, truck traffic is mostly local and therefore on the day shift. Traffic is much lighter, so cars won’t be passing you with oncoming traffic. But they do roll up the streets in town at night (even the bars close early), so make sure you restock before dark.

Doing long climbs in the dark is really something else. All you can see is 100 feet of up, then you go 100 feet, and there’s another 100 feet of up, and so on, and on, and on. You have no way of knowing how much of the climb is behind, much less ahead. And you don’t get the satisfaction of seeing more of the sky above or the valley below as you climb. Descending in the dark is another thing altogether. The randonneur’s basic rule is don’t go down faster than your guardian angel can fly….
Time management is key. The reason I couldn’t ride more miles per day was not physical fatigue—I just ran out of time to ride. After I got off the bike, I could have gone out dancing if I had the time. But all the logistical challenges can be real time eaters if you let them. All you really need to do is ride, eat, and sleep. If you’re not doing something directly related to one of those three things, you’re wasting time!
Ride when conditions are good, and rest when they’re not. You get bonus points for dodging an isolated thunderstorm in a covered picnic area or other shelter where you can take a nap. Double your bonus points if you ride out that thunderstorm in a store, restaurant, laundromat, bike shop, or a campground or public pool with showers, where you can also do useful chores. And triple bonus points if you sleep through a bigger storm system, 100°F+ heat indices, or strong headwinds, in a motel. No bonus points for riding out a storm in your bivvy out in the open, but you do get to continue to play….

You can forget about the concept of a day. Why limit yourself to a fixed schedule? My original plan was to sleep out every other night, only staying in a motel every second night. I ended up just staying out as long as practicable, then crashing in a motel when one was conveniently available, day or night. Many rural motels will be closed at night, so check in early, or call ahead before the office closes.
You can check into most motels after 7 am if they had vacancies, without paying for an extra night, so plan accordingly if you are on the night shift. This is good for a longer stay to do laundry, resupply, and catch up on lost sleep, or to sleep through the heat of the day when the weather is particularly oppressive. I wasn’t able to get a full night’s rest when sleeping out, so I ended up just taking ditch naps between motel stays.
Take photos of your AAA, AARP and other discount cards with your phone so you don’t have to physically carry and keep track of the cards (Super 8 motels have a AAA discount, and Motel 6 has an AARP discount). Photos of your ID and insurance cards could also be helpful in case you lose them. I carried one photo ID on me, and another in my pack, so I could still fly home if I lost one.
Most towns in the Great Plains have parks, some with covered picnic areas and even bathroom facilities. These can be good places to stop, especially to ride out a storm. Along the Trans Am Trail, folks are used to transient cyclists camping out, so nobody hassles you. Pay it forward by leaving only footprints.

All but the smallest rural towns have one or more dollar stores, like Dollar General, Dollar Tree or Family Dollar. These can be cheap, quick one-stops, to resupply food, drinks, and sundries, and replace what you have used, lost, or broken (like USB cables that seem to fail so often). They are much smaller than the big-box stores that are just too big to find everything quickly, and items are less costly than at gas station convenience stores or truck stops. If you have never really shopped in one, check it out before you leave so you know what kind of things they have, and how to find them quickly.
Many rural towns don’t have overnight AM delivery, and some only have second day service. If you develop a problem that will require you to stop to get a new part shipped, call first to see where to ship it. When a spoke nipple pulled through my rear rim in Wyoming one afternoon, I stopped in the next shady spot to call and have my supplier check what type express delivery service was available in the next town ahead, as well as the town behind. Both towns only had next day PM delivery, meaning I would lose 24 hours waiting either way, so I proceeded to the next town. But if I could have gotten the part sooner in the town I just left, I would have turned around.

PRE-RACE PREP
Start loading up your gear for training rides, because that’s part of your training too. This race is as at least as much of a logistical challenge as a physical and mental one. Get everything you are likely to need while on the road accessible in an outside pocket to avoid unpacking and repacking your bag over and over to reapply lip balm, or sunscreen, or butt cream, or bug spray.
Test your full bike set-up on some overnight trips first. You really need to have your system down pat before you start the race so you don’t waste a lot of time getting it together en route. I recommend doing a couple of weekend overnights from home to log some long miles and deal with the unknown unknowns ahead of time. Try to do at least one all-night ride as well so you know what that’s like.

Make sure you get in one final test ride after servicing the bike, with enough time to fix any problems you may find. Otherwise you may be scrambling to fix something the day before the start. Take another test ride after re-assembling your bike before the start.

Consider using a bike shipping service to get your bike to the start, and vice versa wherever you finish. Any bike shop should be able to pack your bike in a used bike box, and ship it via the underlying carrier (FedEx or UPS). I didn’t have time to arrange that. I was still configuring my bike until the last minute, so I boxed it up and took it with me the day I flew out. My bike made the flight OK, but one rider had her DI2 cables cut by TSA for some unexplainable reason. There’s a bike assembly area at the Portland International Airport (PDX), so that’s helpful. But I still had to get the bike and myself to Astoria, OR, which is 100 mi away.
Plan to get to there with time to spare. I flew into Portland OR on Thurs night, and just had Friday to get to Astoria. I checked into my hotel there after sunset, and had to be out before sunrise to get to the start. Plan to spend two nights in the same hotel near the start rather than checking in and out in less than 24 hours. You’ll be doing plenty of that on the race, so no sense doing it before the start.

You can stop at Bicycle Tires Direct, which is very near the Portland Airport, to get any last-minute bike parts (e.g. CO2 cylinders which can’t fly). They have a brick-and-mortar store in addition to a mail order operation, so they are also a well-stocked resource for emergency resupply from the road. I’m glad I stopped in and introduced myself, so when I needed a new rear wheel in Wyoming, they knew who I was, and really helped get me going ASAP.

Take the Amtrak Bus from Portland to Astoria. I decided to take the train from Portland to Kelso WA, and then rode the last 50 miles as a warm-up. It was pretty, but it was hot and hilly, so that didn’t help. I also missed the Friday group ride to the Astoria Column, and the chance to meet my fellow racers there. I did make it to the brew pub for the pre-ride festivities, which I do recommend.

FIRST QUARTER: WEST OF THE CONTINENTAL DIVIDE
Pre-pack meals ready to eat for the first day. The Oregon coast has some spectacular scenery; stop and enjoy it while eating out, rather than looking for a place to eat in with the tourists. My favorite was the Cape Lookout hang glider launch at mile 83.5.

Take it easy out of the gate. There will be lots of riders of different abilities, so after the neutral, paced roll-out, the pack will stretch out quickly. Know what pace you should keep, and keep it. I knew this, and deliberately dropped back. Still, I got too aggressive trying to climb with other riders, and cramped up once we started climbing in the heat. I ended up having to quit early on the first day, trying to find a cool place to stay with most of the motels already booked solid. So I wound up in back of the back of the pack. I did catch up to some other riders later on, but they eventually scratched, and I did the second half of the race completely alone.
Be extra careful in the Oregon Coast traffic. It’s a tourist Mecca, and if it’s hot on the coast, it will be even hotter inland, so everyone will be migrating to the coast to cool off. One rider collided with a left-turning car on day-1, losing more than a day getting herself and her bike fixed up. She ended up scratching later due to her injuries. So stay aware.
You can get whatever you remember you forgot outside Eugene OR. There’s a Cabela’s for any type of outdoor gear, a sporting goods store, and a few other major retailers a few miles south, off course. It’ll cost you some time, but not having what’s needed could cost more. To take this detour at mile 224, stay on Coburg Road, crossing the river instead of crossing under Interstate-5. Sacred Heart Hospital is less than a mile off course here as well, just in case you need something looked at. Next major population center is at mile 339 on the other side of the Cascade Mountains in Redmond OR, so make sure you are really ready to leave the more civilized world.

McKenzie Pass is the first big climb, over the Pacific Crest divide in the Cascade Range. If it’s hot, try to avoid doing that in the heat of the day if possible. I crashed in a B&B before the higher sections of the climb, which have no services available. But definitely plan to finish this climb in daylight if possible because the scenery is unique. The route takes you up the McKenzie River along the main McKenzie Highway, then branches off the river to the old highway, which was still closed to cars after the winter thaw.

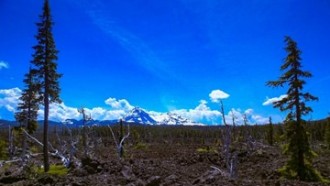
You will climb up to the moon at McKenzie Pass! After climbing through what seems like endless switchbacks in the deep forest, you will get to a 65-square-mile lava flow near the summit. If you’re not in a big hurry, stop at mile 304 to explore the Dee Wright Observatory, which was built from lava rock by the Civilian Conservation Corps during the Great Depression.
Sisters, OR at the bottom of the descent is a tourist town, so motels are expensive. Better options are down the road and just off route at mile 339 in Redmond, OR, which is a much bigger town. After Prineville, OR at mile 358, the next significant population center isn’t until you cross I-84 in Baker City, OR at mile 553.
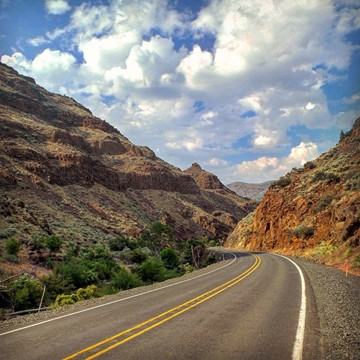
From Redmond you take the Ochoco Highway, up through the Ochoco National Forest. The mountains there are quite rugged, and the road has steep climbs and descents, so make sure your brakes are still in good shape. The first descent from Ochoco Summit, at mile 389, to Mitchell, OR is just stunning. Eventually you will cross into the John Day River valley, taking the John Day Highway up the valley to Prairie City, OR.
Another place to stop briefly is at the covered wagon outside Prairie City, OR, at mile 492, on the way up the John Day Highway to Dixie Summit. Consider how different it was for people on the Oregon Trail 200 years ago….

Get whatever you need at Baker City, OR, because the climb out of there is through barren, hot, high desert. Then you will descend into the Powder River Basin, which is a ribbon of green in the desert (but with no services).
Oregon is probably the most beautiful state on the route, because of the scenic diversity due to its proximity to the Pacific and the Rim of Fire. After every big climb, the terrain on the other side is completely different.

There is a public bike repair stand at the Copperfield Campground, after Halfway OR, at The Oxbow in the Snake River at mile 623, just 1000′ off route. This is a good place to check your bike over and re-true your wheels (also to drink and re-fill your water bottles). From there the course runs up the Snake River, crossing into Idaho, before going up and around the Cuddy Mountains. When I did this run, the wind was really howling up the narrow descent—it was so bad I had to pedal all the way up, and all the way down too!
The White Bird, ID climb is insane, with a dozen or so switchbacks up the side of White Bird Hill. I think the course designers sent us this far north just to do this climb! Stop at mile 773 in White Bird to eat first if you’re hungry. Next resupply isn’t until Grangeville, ID at mile 794.

There’s slim pickings from Kooskia, ID at mile 818 to Lolo, MT, at mile 950, including almost 100 mi of no cell phone coverage at all, so make sure you have everything before you leave Kooskia. There is a store and restaurant at Lochsa Lodge at mile 905 which is a good place to stop before climbing into Montana at Lolo Pass (mile 918).

I stayed at the Lodge at Lolo Hot Springs, at mile 925. I think the hot mineral bath helped. They also have a restaurant/bar on site. There are several other hot springs resorts along the route—I definitely recommend staying, or at least soaking, in one of them!
From Lolo, MT, take the bike path south. U.S. 12 is just too sketchy. If you really need something at this point you can go to Missoula MT, which is a big university town 11 miles north, off course of course. Hamilton, MT is a medium sized town 40 miles south at mile 987, with a bike shop on course. They were down with the whole TABR program, so it’s a good place to stop and sign in anyway. Next bike shop isn’t until West Yellowstone, MT at mile 1267.

SECOND QUARTER: ALONG THE DIVIDE
First Continental Divide crossing is Lost Trail Pass, at mile 1034. You will cross briefly back into ID, but don’t miss the left turn at the state line, off U.S. 98 to Rt. 43 back to MT, or else you will get a big bonus climb!
Enjoy the scenery in the Big Hole Valley, because you’re deep in the high country now, above 6000′. You will ride up the Big Hole River from Wisdom, MT to Jackson, MT, where there is a bicycle hostel at mile 1078. I stopped there briefly to avoid a rainstorm, do laundry, and eat, then rode off into the night. The Jackson, MT post office is inside the hostel, so that’s a good place to advance mail yourself stuff via general delivery, like a new cycling kit a size smaller.

West Yellowstone, MT is the last resupply for a while. You’ll be riding through Yellowstone and Grant Teton National Parks, so there are only visitor centers and campgrounds, and the Headwaters Lodge & Cabins at Flagg Ranch in Grand Teton at mile 1938. There’s a gas station and convenience store there too. If you sign their guest log, they will give you a postcard with stamp to send home. I had a nice dinner in the hotel restaurant with one of the Tour Divide riders from England who just happened to be there at the same time.
Just ride through Yellowstone NP to get to Grand Teton NP—there’s way more to see there (most of the tourist attractions in Yellowstone, like Old Faithful, are off route). Pay for both parks when you enter Yellowstone, or else you will stop to pay again in Grand Teton. There are three Divide crossings in a row in Yellowstone, but none in Grand Teton. The only good bail-out option in this area, if you need it, is to go off route to Jackson Hole, WY.

The fifth Divide crossing is Togwotee Pass, at mile 1389, where you will cross back into the Atlantic watershed. This is the highest one so far, and is above the tree line over 9600′. Allow extra time to climb because your climb rate will decrease with increasing altitude. If it’s getting late, you can stay overnight at the Togwotee Lodge at mile 1380 and finish the climb in the morning. I stayed at a campground in the valley and did the whole climb in the early morning. Don’t start this climb too late. There’s a lighted warning sign that says stay in your car to avoid the bears. I didn’t see any bears, but I did see a wolf in the road.

You will descend along the Wind River through Crowheart, WY, and then climb back over the Divide twice more to get to Rawlins, WY at mile 1620. It’s high, dry desert between the two divide crossings, and there are no services, much less surface water you could filter, so make sure you have enough water.

The route runs along Interstate 80 across the North Platte River in Whitehorse Canyon, from mile 1628-1640, because there is no other contiguous parallel route. I-80 supplanted the Lincoln Highway, U.S. 30, which only exists in broken sections now. It’s not a big deal, because there is a wide shoulder, so the trucks will actually be further away.

The eighth Divide crossing is Willow Creek Pass (9683′) at mile 1760, below Parkview Mtn. At the bottom of the southbound descent, the course actually turns right to go West, down the Colorado River, to Kremmling, CO. It’s a medium-sized town where you can rest and resupply before your final big climb all the way up the Blue River tributary.
Hoosier Pass at mile 1873 is the last and highest divide crossing (>11,500′). You can also stop at mile 1863 in Breckinridge, CO prior to resupply/rest. There is a large, well-stocked bike shop in Breckinridge too.

THIRD QUARTER: WEST OF THE MISSISSIPPI
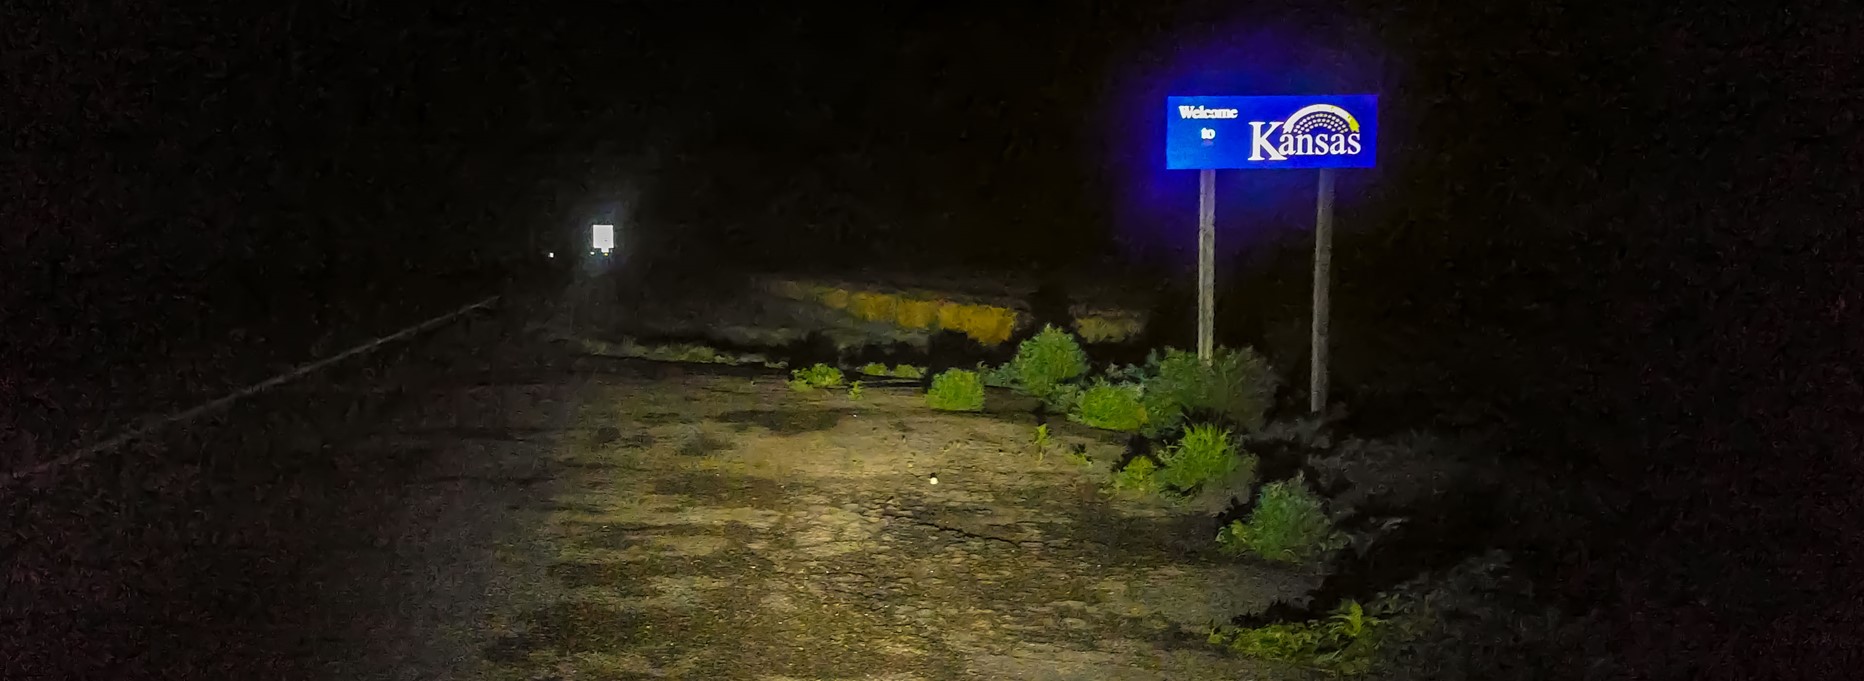
Pueblo, CO is almost the halfway point at mile 2010. This is your last good resupply point for a while. It’s also a good place to bail out if needed. Rental cars are available here, and Denver International is not too far away (or your significant other could do the reverse to visit you on course). You’re heading into the plains from here, so services are limited. East of Pueblo, the route splits off the Arkansas River, and follows an abandoned Missouri Pacific Railroad mainline to Scott City, KS at mile 2224. You’ll be looking at abandoned tracks and poles for a long time.
The Mississippi is downhill from here! But you only lose about a mile of altitude in about 1000 mi, so that’s an average grade of only -0.1%. Your tire rolling resistance is 0.3-0.4%, so it’s not like you can just coast all the way….
Nothing to see here, so move along. The Great Plains are a great place to keep your head down and hammer. I was hoping to use all that high altitude training from the Rockies to start making up for lost time here, but it didn’t work out that way….

When you ride at night, breathe through your nose and keep your mouth shut, especially where the fields are irrigated in the dry area east of the Rockies. If you do that, and wear clear glasses at night, the bugs mostly eat the crops, and won’t be a problem while you’re moving (and there’s your motivation to keep moving). If you need to stop somewhere, and nothing’s open in town, try the post office lobby for shelter.

It will probably be wheat harvest time in Kansas, so watch out for wide load rigs carrying the harvesters around. The trucks that haul the grain from the field to the silo get paid by the bushel, so they will be in a hurry to make quick turns as well.
Plan to stop at the Newton Bike Shop, the “Oasis In The Grass Desert,” just a block west of course at mile 2449. Just do it—you won’t be sorry. You can also crash in the hostel there. Call ahead if you’re arriving late because they will meet racers after hours. This is a good time to replace anything that won’t last another 2000 miles, or at least the 500 miles to the next bike shop.
Kansas is mostly flat, except around Eureka, KS, between about miles 2500-2550, the Flint Hills are a bit more interesting. The rocky soils there aren’t suitable for plowed crops, so it’s mostly ranchland and tallgrass prairie. Enjoy the gently rolling terrain while you can.
Southern Missouri isn’t flat! The route runs through the Ozarks almost the full length of the route in MO, but they aren’t mountains so much as giant rollers—imagine a clown car roller coaster. Actually the Ozark Highlands (and especially the Salem Plateau, which runs from the Little Sac River around mile 2728 to the Mississippi), are a deeply dissected plateau, so the hills are actually gullies.
Farmington, MO at mile 2950 is the next really big town. It has everything, so you can find whatever you want. I took a rest day there on July 4th to leave the drunks to fight it out amongst themselves on the road. A bail out option here would be to rent a car and drive to St. Louis, MO, which has reasonable airline service, or vice versa for a visit.

FOURTH QUARTER: EAST OF THE MISSISSIPPI
You cross the Mississippi River at mile 2995 over the Chester Bridge, to Chester, IL, ancestral home of Popeye the Sailor Man. Not much in Chester proper, but there’s a WalMart shopping center and a McDonalds just off course if you stay on Rte. 150 to Campton, IL.
Carbondale, IL is a college town with three bike shops, all within a block of each other. They should have whatever you need at this point. But to get there, continue about a mile off course on Rt. 13 from mile 3043. The next town approaching this size is Bardstown, KY at mile 3356. I went into town to wait out the second of four thunderstorms that day. A bail out option here, if needed, would be to take the Amtrak train to Chicago and connect via air or rail from there (no rental car needed).
Southern IL isn’t flat prairie either. The area around Carbondale was covered by the extreme southern reach of the Laurentide Ice Sheet during the next to last ice age, more than 100,000 years ago, so the terrain there was glaciated. But as the course heads south outside the glacial margin it enters the area known colloquially as the Illinois Ozarks, or more properly as the Shawnee Hills. The Shawnee National Forest area here is, as you might surmise, more wooded than most of the Great Plains.
You will cross the Ohio River to Kentucky on a ferry, from Cave in Rock, IL at mile 3130. It’s free, but only runs during the day, so plan to stay somewhere on the Illinois side if it’s late. There is a park just East of the ferry dock where you could wait. On the Kentucky side is Amish country, so limited services ahead.

I think Western KY is the nicest section of the route to ride. The terrain is gently rolling, which keeps it interesting, but not too interesting. It’s not flat like KS, or rocking and rolling like MO.
Berea KY, is the last big college town before Appalachia. There are chain hotels, a buffet restaurant and a Tractor Supply on course just west of town, along I-75 at mile 3445. Leaving Berea there is a little hill to get to Bighill, KY, and after that is (you guessed it) a big hill climb to get up to the Cumberland Plateau. That is Daniel Boone Country, which is much hillier than the rolling Blue Grass physiographic province you just left. The Cumberland Plateau is the southern part of the Allegheny Plateau, which is also a dissected plateau.
Watch for loose dogs in Appalachia! Dog owners in Eastern KY and Western VA apparently think their dogs are your problem, not theirs. Carry pepper spray, and don’t be afraid to use it. I nearly crashed in a deep ditch when a big dog about the size of a small horse was up my butt before I knew it (watch out for the dogs that don’t bark). The pepper spray immediately neutralized the threat, but I also sprayed my left arm, which was a pain.
The course will loop around the end of Pine Mountain ridge, which forms the border between Kentucky and Virginia here. It runs downstream on the KY side to Elkhorn City at mile 3620, but on the Virginia side the course runs up the Russel Fork, which flows into the Ohio River that you crossed by ferry previously. The Russel Fork is popular with white water Kayakers, so you’ll be seeing a lot of them, and their support vehicles. There is a race checkpoint at the Breaks Interstate Park entrance a few miles into VA.

After Council, VA is the last climb in the Cumberland Mountains at mile 3656, over the Cumberland Plateau Front. This is the southern analog of the Allegheny Front of PA, MD, and WV. These fronts form the boundary between the Ridge-and-Valley Appalachians province to the east and the Appalachian Plateau to the west. From there you will descend through the foothills, then will continue SE across the ridges and valleys almost to the Tennessee state line, before turning NE and running parallel to the ridges.

You will cross the Appalachian Trail in Damascus, VA. This is a trail town with several backpacker type outdoor stores. They also have a bike shop. This is a good place to restock, because there’s slim pickings ahead as you enter the Blue Ridge Mountains. You will be climbing to the highest point on the route East of the Mississippi (3756′) at mile 3724 in Laurel Valley, below Mount Rogers which is the highest point in Virginia (5,728′). Then you will descend out of the Blue Ridge and back into the Valley and Ridge province.

Radford VA, is a medium sized college town, that should have whatever you are jonesing for. You will join the New River around mile 3801 and follow it for two miles before crossing the bridge into town. New River is actually a misnomer—it’s one of the oldest rivers in North America. It also drains to the Ohio River, so it’s been trending uphill since you left Illinois!
You will cross the Eastern Continental Divide (2100′) at mile 3818, leaving Christiansburg VA (after making the right turn onto Ellett Rd, and just before passing under the railroad trestle). This divide, while not nearly as prominent as the Great Divide crossings in the Rockies, separates the Gulf of Mexico watershed and the Atlantic Seaboard watershed. It’s all downhill from here! OK, not really—it’s less than 0.5 mi down in 500 mi, which is an average slope of less than 0.1%, but down is still better than up.

The final big climb is up the Blue Ridge from Vesuvius VA, at mile 3923. At the top you will join the Blue Ridge Parkway at Tye River Gap. I did this climb at sunset, and rode the parkway segment in the dark, but with a full moon, so the scenery was still visible. There was no traffic, so I could ride down the middle of the road if I wanted to. I’m sure this road is busy with tourists during the day, though. I did stop to eat all my food, so it wouldn’t be bear bait. Don’t stop at the rest areas if they are occupied at night—it’s a meat market (some guy came up to me and tried to grab my crotch!).
On the east side of the Blue Ridge lies the Piedmont Plateau, which extends east to the Atlantic Seaboard Fall Line that runs through Richmond VA. This is an area of less extreme rolling terrain.
Charlottesville, VA is another really big college town, at mile 3987. Most of the motels are off course, though. After Charlottesville, there are a few remaining hills on the Thomas Jefferson Parkway, and then it’s comparatively flat on the coastal plain east of Richmond all the way to the finish.

Colonial Parkway is the worst pavement by far, starting at Jamestown Settlement around mile 4156 all the way until the last mile into Yorktown at mile 4177. It’s just 20 miles of torture, and I had a suspension stem at this point. I let air out of the tires, but that only helped a little. It’s very old concrete, and the cement has eroded from around the aggregate, so it’s like fresh chip seal, with chunks instead of chips. When I stopped that night for a dinner break in Colonial Williamsburg at mile 4165, only the Dog Street Pub was still open.

The Yorktown Victory Monument at mile 4179 is the end! I finished after midnight, so there was nobody there to take my picture. I only had enough time to take a picture of my bike on the monument, before running ahead of one last thunderstorm, checking into a motel just as the rain began to pour.
You can fly home from Newport News, which is not too far from the finish. I rode to Bike Beat, the Trek dealer in Newport News, and they let me take an empty bike box and box up my bike out back.
CLOSING THOUGHTS:
Here are some of the places I stealth-camped: cemetery, campground, roadside ditch, mowed shoulder, park bench, picnic table, behind a church. I also stayed in bicycle hostels, churches, and firehouses intended for bicycle tourists.

Don’t assume the prevailing westerlies will prevail, at least not in the short term. Although the dominant wind flow in the mid latitudes is west to east, don’t count on it if you are eastbound. When I was riding, there was a persistent high pressure system over the Dakotas. Its clockwise flow produced mostly headwinds along the continental divide and the plains. You have to play the hand that is dealt, and this will not always be in your favor. Remember that hills build strength, but headwinds build character. So your character may need to prevail.
My friends said ‘you must have been exhausted at the finish,’ but they didn’t have a clue. Yes, I was extra tired from making one final push to the finish from Charlottesville, VA on a 95°F hot day. But, if I had the time, I could have turned around to ride all the way back, no problem. At that point, riding my bike all day, every day was just the normal baseline.
The first week is the toughest, because everything hurts more each day. But after hitting peak pain later in the week, it started getting better. What I learned from this is that whatever pain you think is from riding too much, actually results from riding too little.
Try to keep it between type-1 and type-2 fun. Type-1 fun is fun the whole time you’re doing it. Type-2 fun is only fun in the rear-view mirror. Type-3 fun is not fun at all….

Find reasons to keep going. It’s easy to find reasons to quit (and if you have a really good one, then it’s better to live to fight another day). Expect that from time, to time, to time your mind will wander into dark places, especially when it’s dark out! Let it wander, but don’t dwell. Remember how much time, money, and effort you put into getting as far as you got, so compared to where you’ve already been, it’s really not that much further to get where you want to go.


Awesome Doug, just packed with useful information but the photo’s alone are worth it.
LikeLiked by 1 person
Wonderful follow up to your Huntington Bicycle Club presentation.
Loved every word.
LikeLike
Great write-up Doug. Really enjoyed reading it.
LikeLike
Amazing read. Thank You.
LikeLike
hi Doug. so happy to see your dot on the move again. i am a (semi) loyal fan of Conte’s, and behind you all the way.. which means only that i am slower than you. let me know if there is any way (within the rules) that i can help you along the way. hey, the lantern rouge is an honor carried only by a very select few. carry it proudly.
LikeLike
Hi Doug! We will be watching for you in Monmouth and Dallas Oregon. We enjoyed tracking you last year and this year, and would love to say hello! Karen and Doug Marshall
LikeLike
Thanks for the pingback. Yes I was racing in the Trans Am Bike Race 2017 westbound this year. The linked blog post is from my eastbound race last year. The race is actually organized outside the ACA, but the route mostly follows the ACA Trans Am Trail which is based on the original Bikecentennial route from 1976.
LikeLike
Doug, so great to find you. You still have an amazing ability to chronicle and tell the story. (I have a Townie bike!) Looking forward to talking with you. I’m on FB, everything is public.
LikeLike
Great write-up! Definitely has information that I will use this year. I rode past you going the opposite direction as you were rolling into Baker City last year. (I was kind of Dot-Watching but waited too long to go out to find you, I ended up getting a nice ride though) Thanks for the pictures as well!!
LikeLike
Doug, this is really an amazing guide. Thank you for the time you spent writing it up. It’s taking me several days to finish it! I plan on racing the TABR someday, maybe next year. Do you have any desire to do it again?
LikeLike
I couldn’t do the race again this year, but I did go out to Astoria for the start, then continued southbound to Mexico this time.
LikeLike
Amazing read! Will do a credit-card-touring version of your trip this summer. I have not yet found great information on the grades of the hills. Any information on the length and grades of the hardest climbs?
LikeLike
You can look at the elevation profile on RideWithGPS, but why? It really doesn’t matter. They are what they are, and you just deal with it!
LikeLike
Talk about inspiration to do this race – reading this gave me butterflies! Definitely on my bucket list now
LikeLike
Really enjoyed reading your writ up. The ride prep was daunting, let alone the ride itself.
LikeLike
I had not discovered this previously, but saw the link in your strava profile. It’s really amazing, so comprehensive, and the photos – I would love to know how you do that with limited gear? HDR?
LikeLike
All cell phone photos post-processed in Adobe Lr.
LikeLike
That is quite a story, and your recommendations are well taken. My longest rides are a ride from Boston to the Canadian Maritimes and a month riding through France. I did both when I was much younger, but I have always wanted to the ride across the U.S. After reading your story I’m not sure that I’m up to it. I’ll start asking questions of one of my bike club members who is also a Radonneur (however that is spelled).
And your photos are incredible. Were they really taken with a cell phone?
LikeLike
Yes, IPhone 5 & 7, LG V10 and a Samsung Galaxy Cam 2.
LikeLike